
Modern phone photos are large. A single photo from an iPhone is often several megabytes, so a folder of holiday pictures can fill gigabytes of storage and fail to attach to an email.
The good news is that you can usually shrink a photo to a fraction of its size while it still looks the same on a screen. This guide shows five free methods built into your Mac, and explains which settings actually protect quality.
Quick Answer
To compress photos on Mac, open the photo in Preview, go to Tools → Adjust Size and reduce the width, or use File → Export and lower the Quality slider to around 75–85%. For many photos at once, select them in Finder, right-click, and choose Quick Actions → Convert Image.
Two Ways a Photo Gets Smaller
Understanding this helps you choose the right method.
Resizing reduces the number of pixels. An iPhone photo is around 4000 pixels wide, but a website or email rarely needs more than 1600. This is the biggest saving and has no visible effect at normal viewing size.
Compression lowers the JPEG quality setting, which discards detail the human eye barely notices. Between 75% and 85% quality, photos look nearly identical to the original but are much smaller.
Using both together gives the best results.
Method 1: Resize in Preview
Preview comes with every Mac, and it’s the quickest way to shrink a single photo.
- Right-click the photo and choose Open With → Preview.
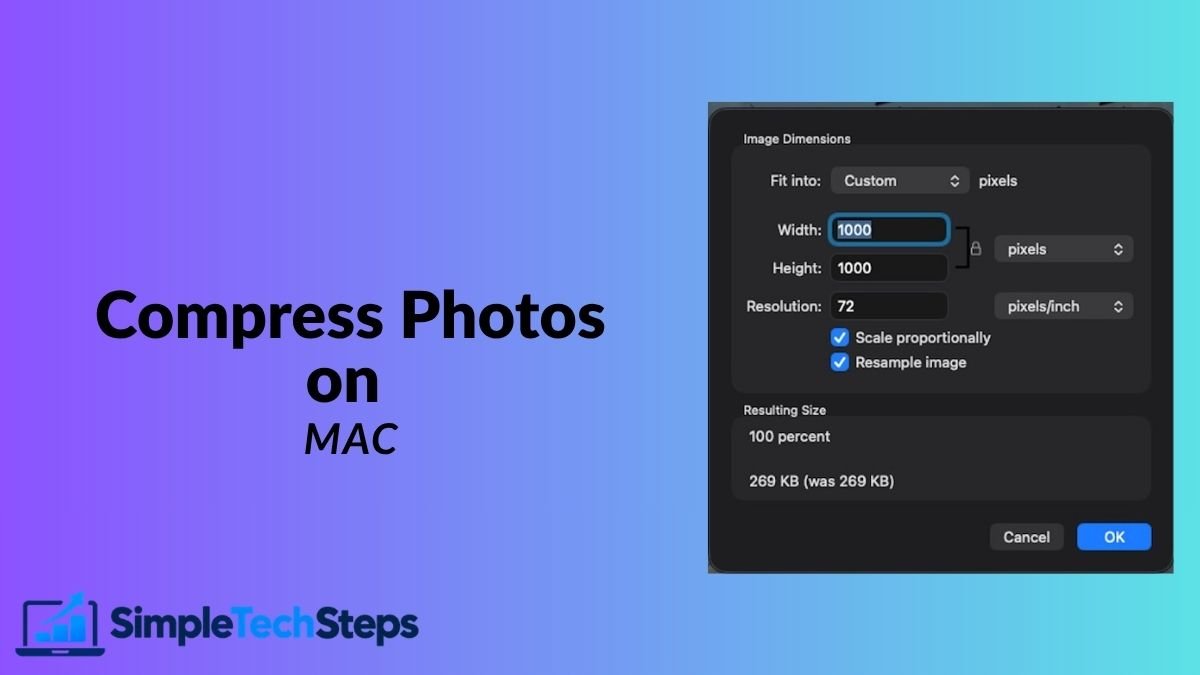
- Go to Tools → Adjust Size.
- Make sure Scale proportionally and Resample image are ticked.
- Change the Width to 1600 pixels (the height updates automatically).
- Click OK.
- Go to File → Export to save a copy, or File → Save to replace the original.
Important: Save replaces your original file. If you want to keep it, duplicate the photo first (File → Duplicate) or use Export.

Method 2: Lower the Quality When Exporting
- Open the photo in Preview.
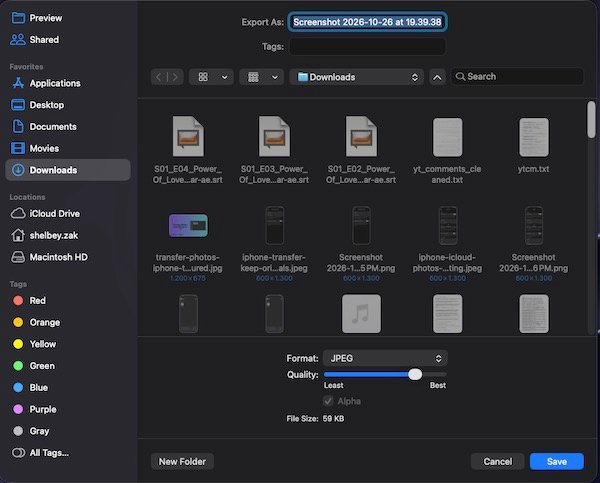
- Go to File → Export.
- Set Format to JPEG.
- Drag the Quality slider to about 75–85%.
- Watch the File Size shown below the slider.
- Choose a name and location, then click Save.
If you can’t see the Quality slider, make sure the format is JPEG, since it only appears for JPEG and HEIC.
Method 3: Compress Many Photos at Once with Finder
This method is best when you have a whole folder of photos.
- Select the photos in Finder.
- Right-click and choose Quick Actions → Convert Image.
- Set Format to JPEG.
- Choose an Image Size: Small, Medium, or Large.
- Click Convert.
Your Mac creates new, smaller copies next to the originals, so nothing is overwritten.

Resize many photos in Preview: open all of them together, click the first thumbnail in the sidebar, press Command + A, then use Tools → Adjust Size. The change applies to every selected photo.
Method 4: Choose the Size When Exporting from Photos
If your pictures are in the Photos app:
- Select the photos.
- Go to File → Export → Export [number] Photos.
- Set Photo Kind to JPEG.
- Choose JPEG Quality: Low, Medium, High, or Maximum.
- Choose Size: Small, Medium, Large, or Full Size.
- Click Export and choose a folder.
High quality with Large size is a good balance for sharing. Your originals stay safely in your library.
Method 5: Use Terminal for Bulk Work (Optional)
If you’re comfortable with Terminal, the built-in sips tool is very fast. This command makes a smaller copy and leaves the original untouched:
sips -Z 1600 photo.jpg --out photo-small.jpgIt resizes the longest side to 1600 pixels. Always use --out so you don’t overwrite your original.
What Size and Quality Should You Choose?
- Email and messaging: 1200–1600 pixels wide, quality 75–80%.
- Websites and blogs: 1200–1600 pixels wide, quality 75–85%, ideally under 200 KB.
- Printing: keep the original size and high quality.
- Archiving: keep the originals, and compress copies only.
Never compress your only copy of a photo. Quality lost in compression cannot be recovered.
Common Mistakes
- Compressing the same JPEG again and again, which lowers quality each time.
- Dropping quality below about 60%, where blocky artefacts appear.
- Using random online compression sites for private photos, since you’re uploading them to someone else’s server.
- Overwriting originals instead of exporting copies.
Frequently Asked Questions
Does compressing a photo reduce its quality?
Resizing and moderate compression reduce file size with almost no visible difference. Heavy compression does cause visible loss.
What’s the best quality setting for JPEG?
Between 75% and 85% gives the best balance of size and sharpness.
Why won’t my photo shrink much?
It may already be compressed, or still at a very high pixel size. Resize the width first, then lower the quality.
Is HEIC smaller than JPEG?
Usually yes, at the same quality, but not every website or app accepts HEIC. Converting to JPEG improves compatibility.
Can I compress screenshots?
Yes. Our guide on how to take a screenshot on Mac explains how to save them as JPG, which is much smaller than PNG.
Conclusion
Resize first, then lower the quality to around 80%, and always work on copies. For one photo use Preview, and for many photos use the Finder Quick Action.
If your photos came from your phone, see how to transfer photos from iPhone to Mac, and if your drive is filling up, our guide on how to free up storage on your Mac covers the rest.